Accessibility
![]()
"What we have are a few people who know a lot about accessibility. What we need are a lot of people to know a little about it.”
-Matt May, Head of Inclusive Design at Adobe
On this page: Challenges | Principles of Accessibility | Resources
What is Online Course Accessibility?
Online course accessibility means that people with disabilities can access a course equally. Accessibility is an important aspect of our course development and teaching processes because it provides each student with equal access and opportunities. A course is accessible to the degree that every student can get to, perceive, and navigate course content and assignments; submit assignments, and successfully use all course tools.
Accessible design is often included under the larger umbrella of “ universal design for learning,” because it considers all possible users. For example, when creating accessible course materials
What challenges do people with disabilities face while working online?
There are various types of disability for which a student may need accessibility accommodations in our courses. Check out the experiences of three different individuals with varying disabilities:
Although there are a myriad of subcategories, the main categories that we want to address in our classrooms are:
1. Visual: Blindness, low vision, color-blindness
Individuals with visual disabilities may:
- need to use a screen-reader and the keyboard to access what's on a computer.
- not be able to use a mouse.
- not be able to tell one color from another.
- need to enlarge text and illustrations in order to see them.
2. Hearing: Deafness and hard-of-hearing
Individuals with hearing loss may not be able to hear the audio in podcasts, voice-over PowerPoints, videos, and other online media.
3. Motor : Inability to use a mouse, slow response time, limited fine motor control
Motor disabilities include paralysis and limited fine or gross motor control. Individuals with motor disabilities may:
- not be able to access content that requires a mouse.
- need to use assistive technologies like head wands and voice-recognition software to access a course.
- have slow response time.
- become easily fatigued by movements that wouldn’t be tiring for most people.
4. Cognitive: Learning disabilities, distractibility, inability to remember or focus on large amounts of information
Cognitive disabilities include learning disabilities and other disorders that make individuals especially distractible or unable to focus on, process, or remember information. Individuals with cognitive disabilities may:
- have trouble reading text or interpreting illustrations.
- need to use a screen reader to help them understand text.
- be confused by complex layouts or navigation schemes.
- have trouble focusing on or comprehending lengthy sections of text, audio, or video.
Accessibility within education is a very important concept because it allows students with disabilities to access and interact with course content, regardless of their conditions. A course that is designed around aspects of accessibility will allow all students to actively participate in course activities and access the information they need to excel.
Principles of Accessibility
Principle 1: Use Headings
When you create content in Canvas, it is important to mark up the page using the built-in style options found in the Canvas Rich Content Editor (RCE). By default, the text will be styled as "normal" or "paragraph." If you are creating sections on your page, you may be tempted to distinguish the headings by using BOLD, italics, or changing the color and size of the text. However, the proper approach is to format the sections as headings. From the format dropdown in the RCE, you can choose from Headings 2-4. By default, the formatting will be determined by your institutional style guide, but you can go in and change the properties in the HTML editor, such as the color, size, alignment, and so on. You can also apply Heading 5-6 in HTML if you choose.
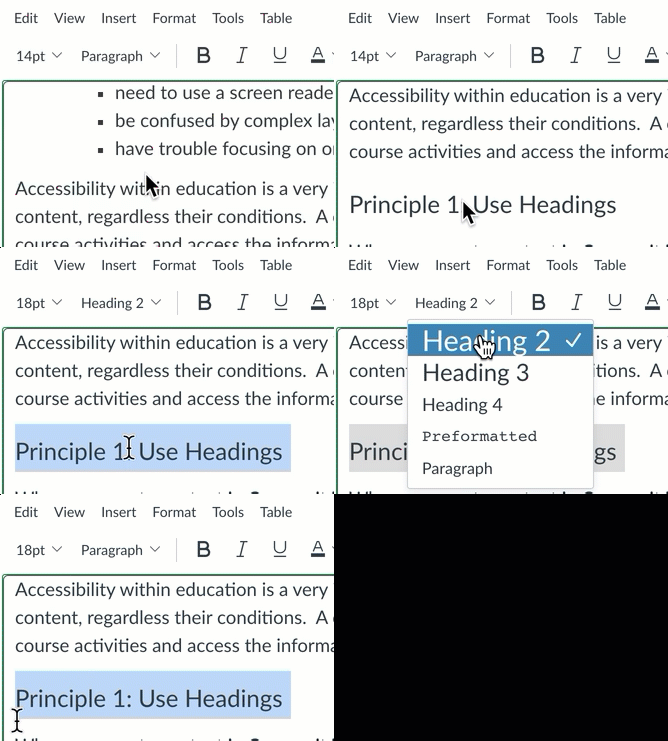
By default, web developer guidelines state that a webpage should only have one Heading 1 - which is the title of the page. In Canvas, Heading 1 is always the title of the assignment/discussion/page, etc., so the first heading you would use on your page is Heading 2. When using headings, it is important to maintain a properly nested order. Heading 2 should be used to delineate the main sections on your page. Heading 3 is a subsection of heading 2. Heading 4 should only follow a heading 3, and should not appear directly under heading 2 or as the first heading on your page. These guidelines will help facilitate screen readers as they navigate through your pages.
Principle 2: Use Alternative Text (alt-text) for Images
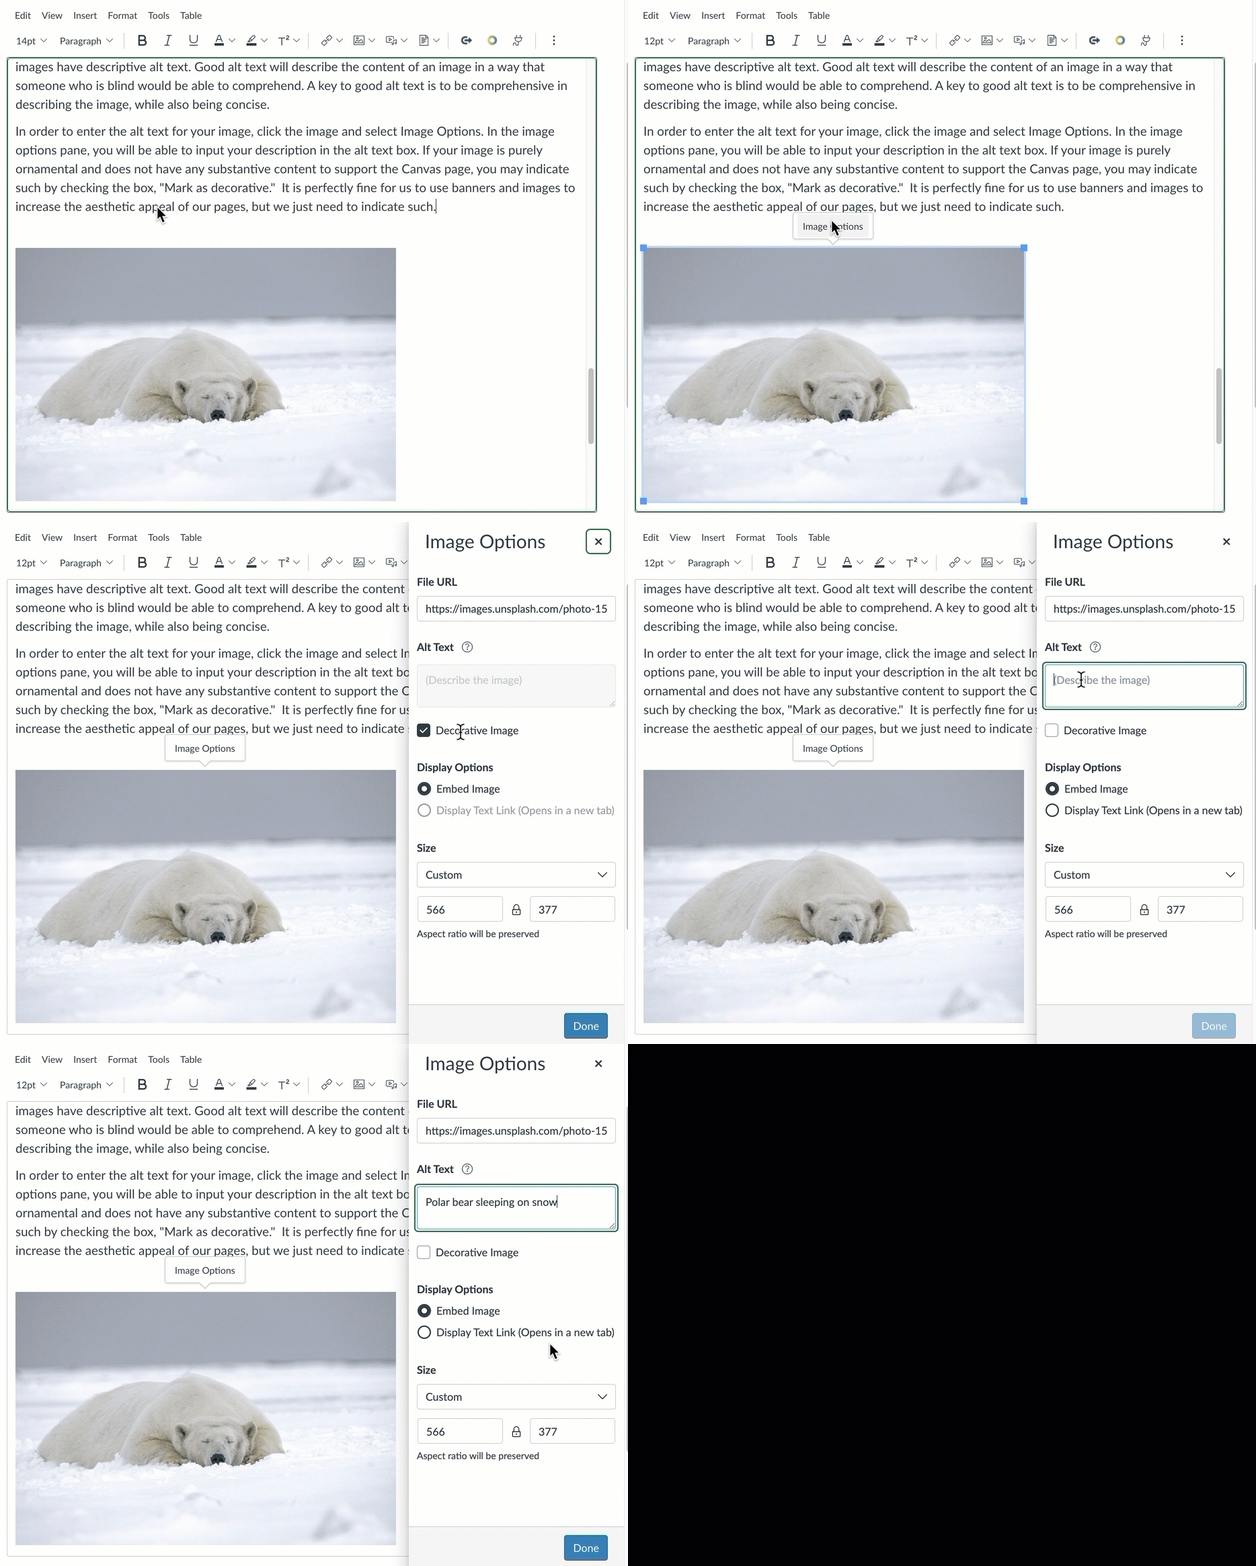
Images are often important for supplementing or clarifying aspects of a Canvas page. Ensure that your images have descriptive alternative text also known as "alt text." Good quality alt text will describe the content of an image in a way that someone who is blind would be able to comprehend. A key to quality alt text is to be comprehensive in describing the image while also being concise.
In order to enter the alt text for your image, click the image and select Image Options. In the image options pane, you will be able to input your description in the alt text box. If your image is purely decorative and does not have any substantive content to support the Canvas page, you may indicate such by checking the box, "Decorative Image." It is perfectly fine for us to use banners and images to increase the aesthetic appeal of our pages, but we just need to indicate such.
Principle 3: Use Tables for Data and Categorization of Information - Not Layouts
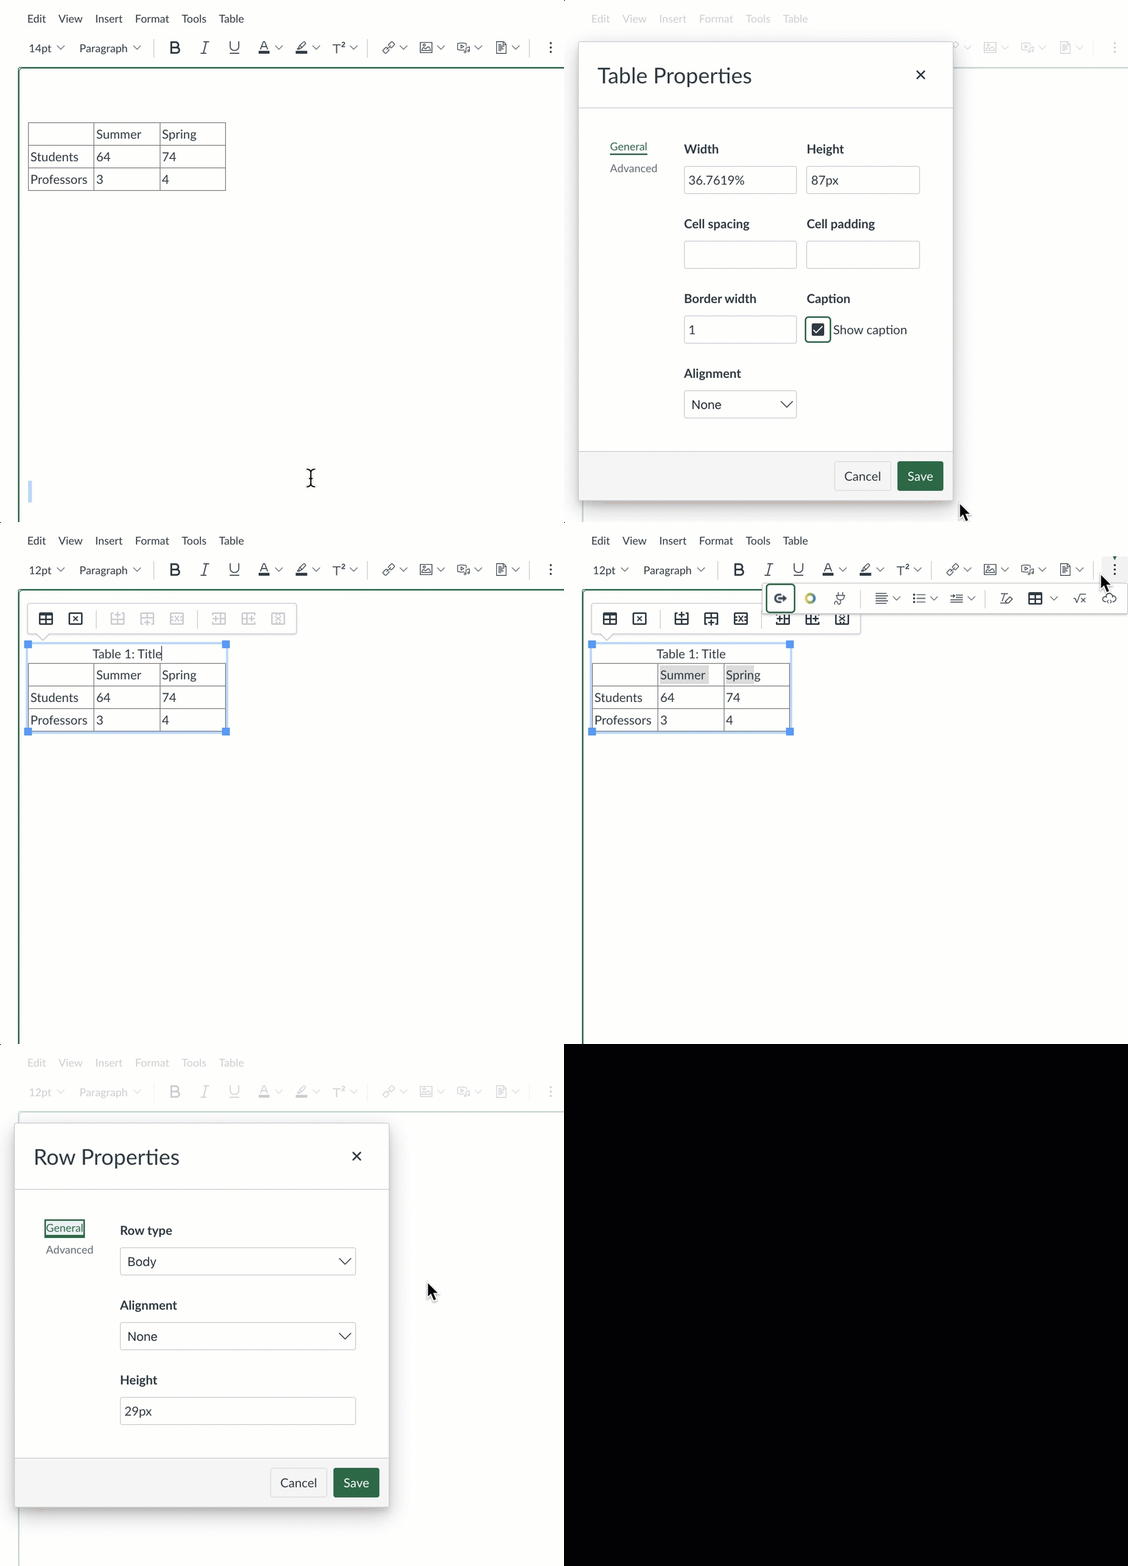
Data tables are used to organize data with a logical relationship in grids. Accessible tables need HTML markup that indicates header cells and data cells and defines their relationship. Assistive technologies use this information to provide context to users.
Tables without structural markup to differentiate between header and data cells create accessibility barriers. Relying on visual cues alone is not sufficient to create an accessible table. With structural markup, headers and data cells can be programmatically determined by software, which means that:
- People using screen readers can have the row and column headers read aloud as they navigate through the table. Screen readers speak one cell at a time and reference the associated header cells, so the reader doesn’t lose context.
- Some people use alternative ways to render the data, for example, by using custom stylesheets to display header cells more prominently. Techniques like this enable them to change text size and colors and display the information as lists rather than grids. The table code needs to be properly structured to allow alternative renderings.
To make tables accessible, we want to be mindful to include header rows (and when applicable, header columns). You can adjust these properties either in the RCE or in the HTML editor - whichever you prefer.
Principle 4: Use Descriptive Text for Links
There are correct and incorrect ways to add website URLs to your Canvas pages.
- The incorrect way to add a URL is to copy the link and paste it onto your Canvas page/assignment/announcement.
- The correct way is to highlight the word or words that you wish to hyperlink and add the URL that way. A Windows shortcut is to highlight the word or words and press Ctrl + K on your keyboard. On a Mac, the shortcut is Cmd + K.
The reason why we do not want to copy/paste links directly onto our Canvas pages is that it is not an ideal practice when considering the process for screen readers, as the screen reader will read the entire URL twice.
When you have either used the RCE or the Ctrl/Cmd + K keyboard shortcut to create a hyperlink, the Insert Hyperlink dialogue box will appear. The main elements will be the Text to display and the Link boxes.
The Text to display box will consist of the text on your document that will be hyperlinked, and the Link box refers to the location where the user will go when they click on the link. Avoid using generic and non-descriptive text, such as:
- Click here
- Here
- Read more
It is a good practice to avoid phrases such as or similar to "click here" altogether, as they tend to be redundant. For example, instead of a phrase reading "Click here to access the readings for this week", this can instead be shortened to "This week's readings". Aim to be descriptive when linking URLs in Canvas. And again, the worst thing for you to do is to simply drop an entire URL, saying click here: https://www.youtube.com/watch?v=dQw4w9WgXcQ, because a screen reader will read each letter, punctuation, number, etc. in a URL.
Principle 5: Canvas Accessibility Checker
Canvas has a native accessibility checker built right into the RCE that will allow you to assess the contents of the page you are editing. This is a great resource for ensuring that your Canvas pages and content meet accessibility standards.
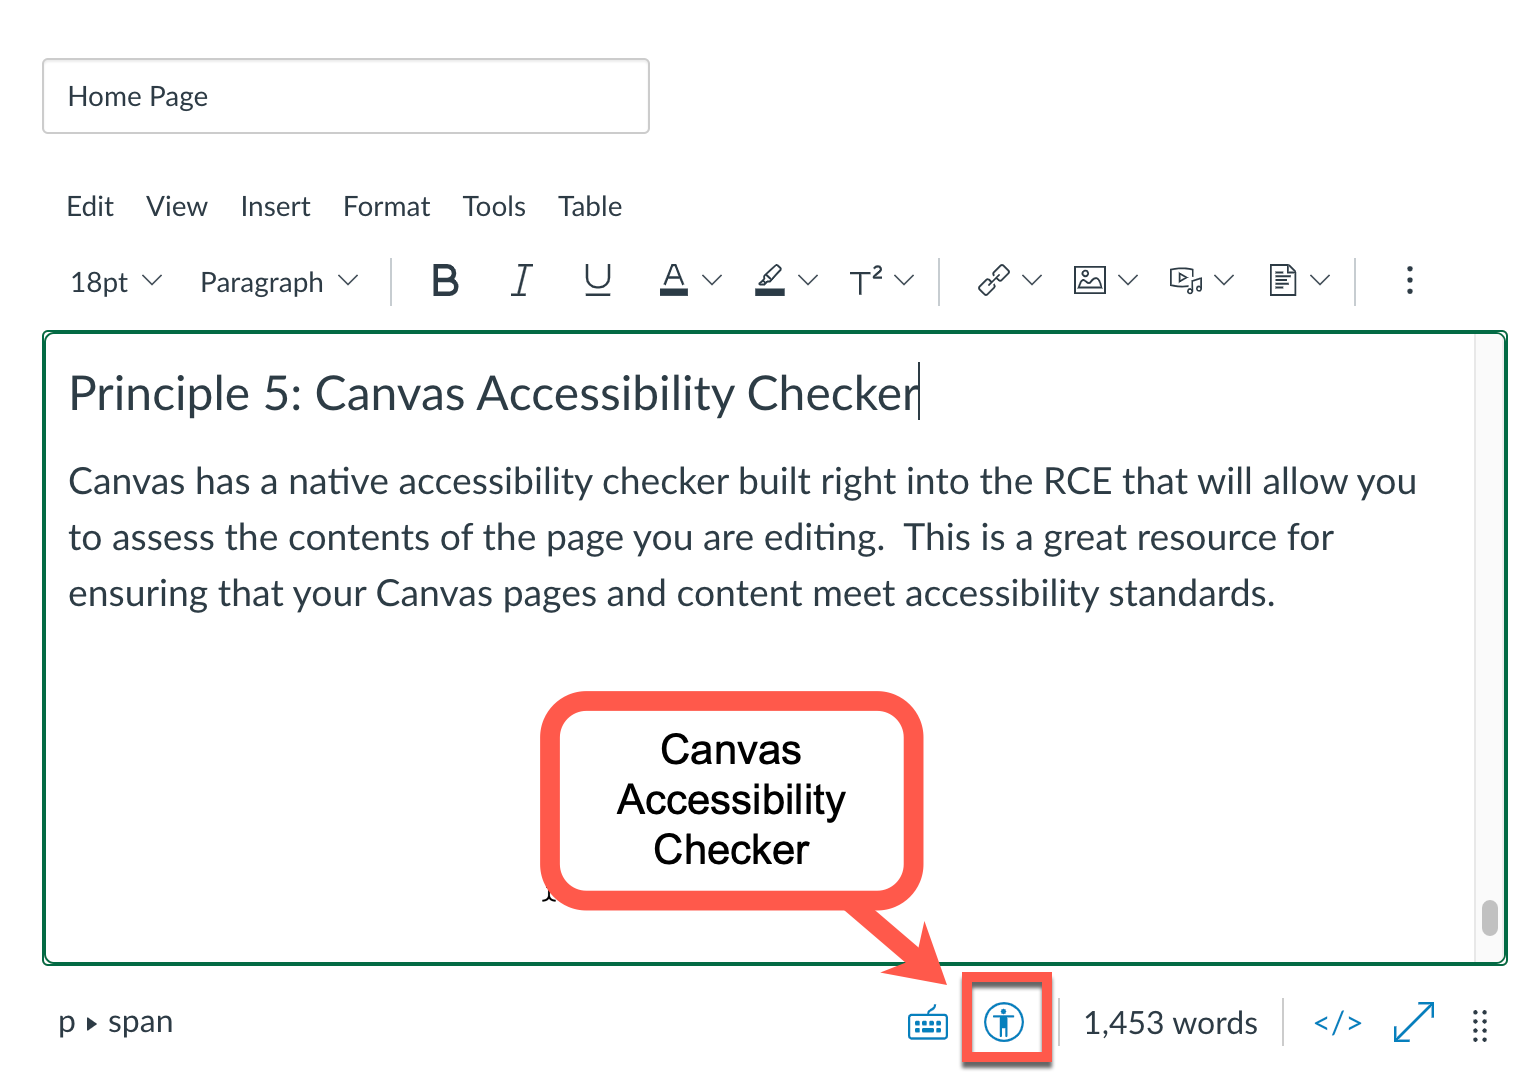
This checker will diagnose various components of your page, such as:
- alt text and image file names
- color contrast
- tables - captions, headers, etc.
- heading levels should not be skipped (e.g., going from Heading 2 to Heading 4)
- lists are formatted as lists
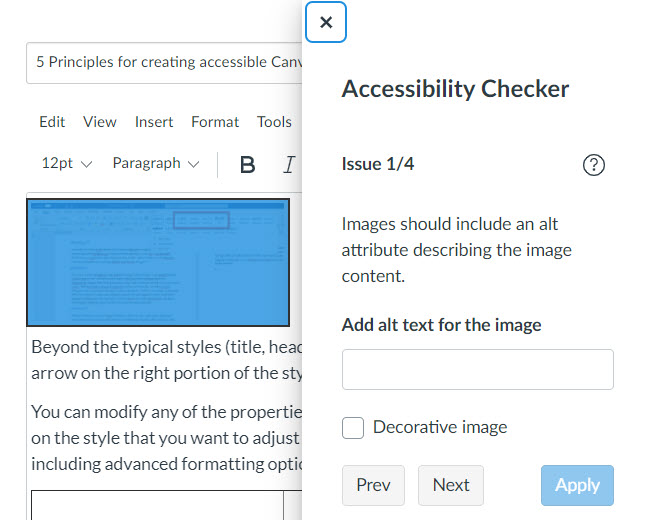
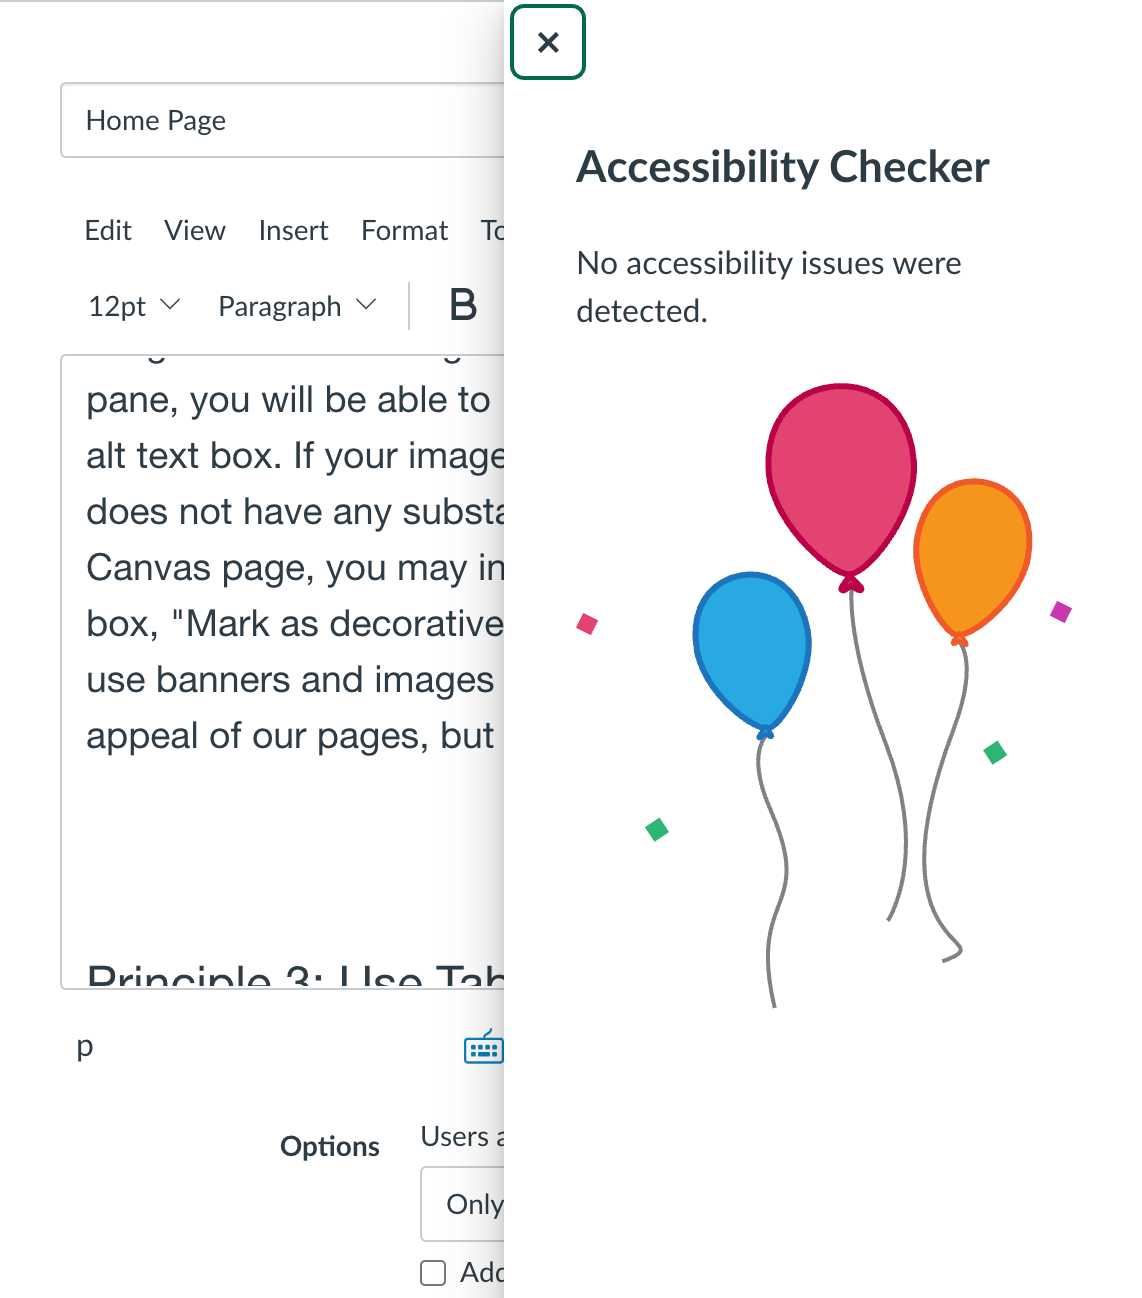
In other words, it will review much of the content that we are discussing today (and more). When your page content meets the criteria of the accessibility checker then you will receive a celebratory confirmation that there are no accessibility issues detected.
Closed Captioning for Videos You Create
Did you know Zoom recordings are automatically moved to Panopto, and all YC users with Zoom recordings are given a Canvas course called "(your name)'s Zoom Recordings" where you can manage, edit, and share them. Contact tels@yc.edu if you don't see this course in your Canvas dashboard.
Panopto is a recording system for making videos and screen captures, and it integrates with Canvas.
All videos in Panopto, including uploaded and Zoom recordings, are auto-captioned. That means, if you record a lecture using Zoom and save it to the Zoom cloud, it will have automatic captioning! It's not 100% accurate, and you can go into Panopto and edit captions that are not correct.
It does require you to manually enable the captions to appear, and do this for each video. The instructions are:
Click on the Edit button next to the video.
- Select “Captions” on the left-hand navigation.
- Choose “Insert Automatic Captions” from the dropdown.
- To edit the captions, simply click on the text and edit it.
- Click “Apply”.
The CC closed captions will be available for that video in a short while. For more on adding automatic captions to Panopto videos, visit How to add ASR Captions into a video.
Resources
Accessibility 101 Course
This self-paced course is designed for YC faculty and staff who create or share digital content. You’ll learn to recognize the essential accessibility guidelines most applicable to your work at YC—whether that’s preparing course content, or sharing information online or by email. By the end, you’ll be able to spot when content needs adjustments to meet accessibility standards.v Complete the course to earn the Accessibility 101 YC Micro-Credential and show your commitment to inclusive communication!
Accessibility Handbook for Teaching and Learning
Pair your learning with this handy, searchable guide. The Handbook walks you through the built-in accessibility features of tools like Canvas, Word, PowerPoint, and more. Bookmark it for quick reference whenever you need step-by-step instructions to apply your accessibility knowledge in practice.
Explore the Accessibility Handbook for Teaching and Learning
Digital Accessibility FAST Instructor Checklist
This tool is designed to help you check individual items for accessibility, beginning with an automated check, and following up with items that a human needs to evaluate. Pair it with the Accessibility 101 course for the background knowledge that makes those steps even easier.
Digital Accessibility FAST Instructor Checklist (Word file)
UDOIT On-Demand Training Video Series
Unlike the Accessibility Checker built into the Canvas Rich Content Editor (which only reviews one page at a time), UDOIT scans your whole course at once. This includes pages, assignments, discussion and quiz instructions, and even uploaded documents. UDOIT identifies potential accessibility issues and walks you through repairing them directly inside Canvas. It's the fastest way to develop a per-course accessibility strategy. Learn UDOIT on demand when you're ready with this video series.
UDOIT On-Demand Training Video Series
Digital Accessibility Zoom Channel
If you need help with any aspect of digital accessibility, this is the place to ask. Someone from TLS will reply to your inquiry within 48 hours (often faster during workdays).
Join the Digital Accessibility Zoom Channel
Feedback on the Accessibility 101 Course - Just do it!
This is a great course! The course intends to increase understanding and awareness of digital accessibility in the context of online teaching and learning. Accessibility work is a responsibility shared among campus citizens, creating a common language and shared understanding of basic digital accessibility concepts and provides a critical foundation for everyone.
The course is well structured and broken into manageable chunks, which makes for a really pleasant learning experience.
When I first saw the announcements about accessibility requirements for electronic and information technology, I’ll admit my reaction was, “Ah,-here’s another cloud over my teaching!” But after taking a deep breath and working through the Accessibility 101 course, I felt much better. Completing the course really eased my anxiety and showed me that, yes, it does take some time, but it’s absolutely doable. So my advice—have at it and Just do it!
Respectfully,
CHM Faculty Gino Romeo
Attributions:
Banner Image Source: Icons adapted from www.flaticon.com
All other images and GIFs created by An Pfister, License: CCO